|
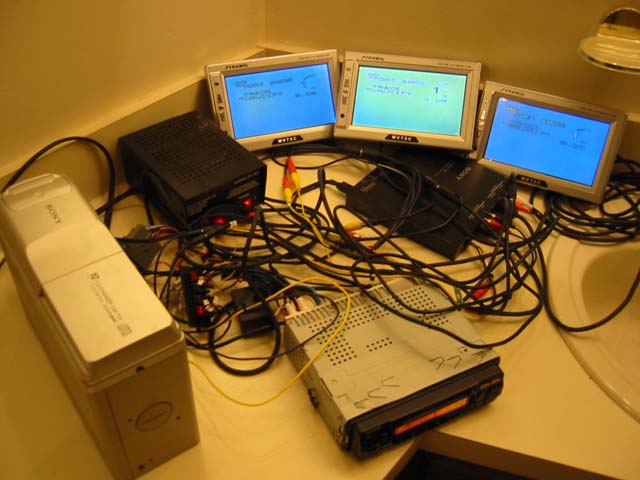
I thought up the plans, and what I was going to do... I ordered a few 7.2" LCD screens from eBay dirt cheap. They didn't require cutting the headrests. I looked at the cost of replacement headrests from Honda, and tried to figure out how I could cleanly mount the 4" LCDs in the headrests. Nothing seemed like it would be easy or good, and everything had too many risky factors of ending up with a lump of stuffing and some leather. The Pyramid LCDs (they are sold under many names) are passive matrix Sharp modules with an engineered board that provides the screen controls. They aren't very high quality. The biggest issue is as they warm up, the contrast on the screen changes! The way they were shipped, it looks okay when first powered on, but then become less visiable at the inital viewing angle as it heats up. Also there is no way to remotely power them on. So I went ahead and fixed these issues.
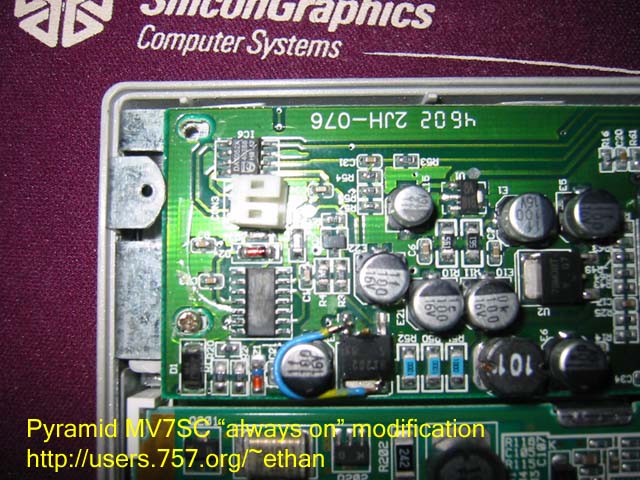
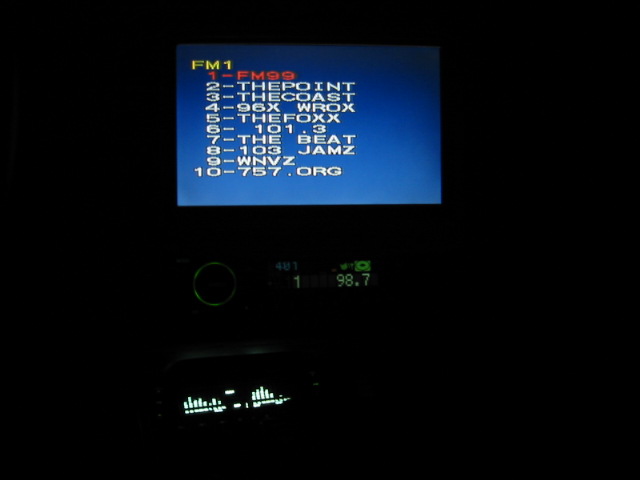
I also picked up a manual pull out ~6" LCD made by Innovatek. This screen was more expensive, costing around $220. I was really worried about the distance it hangs out of the dash. In the pictures on eBay, it looked like it hangs out way too far. After receiving the screen, I can't say I'm at all dissapointed. The picture is very good in my opinion, and the hardware is very sturdy! I wish they sold just the LCD for ~$125, I'd replace both of the Pyramid screens with them!!! During testing, I found that running 3 screens from one source wasn't going to work. I picked up a cheap "XO Vision" 4 port mobile video amplifer, and she worked like a champ. A nice unit, honestly. Without it there was a noticeable degredation of brightness when screen #2 was connected. It's time for some action The parts sat around for a while. It was the middle of summer, and I'm just not feeling working on the car. Then the central air conditioning in our house failed and the irresponsible owner took forever to fix it. One day I decided to just do it. The first thing was to fix the Pyramid LCDs. I figured out a hack to force the power transistor that is used to toggle power on the LCD by the soft power button. It isn't a clean hack, you can't turn the LCD off with it being driven like this. But it works. There are potentiometers on the back of the Sharp module that control contrast. After allowing the display to warm up on the bench, I adjusted it to get it just right. If you attempt to do the same thing, be careful. There is high voltage present for the driver that illuminates the CCFT tubes that illuminate the display. If you get shocked I'm not responsible. (It isn't THAT bad, it gives ya a good jolt and there is this odd burning flesh smell in the air but no wound, from experience).
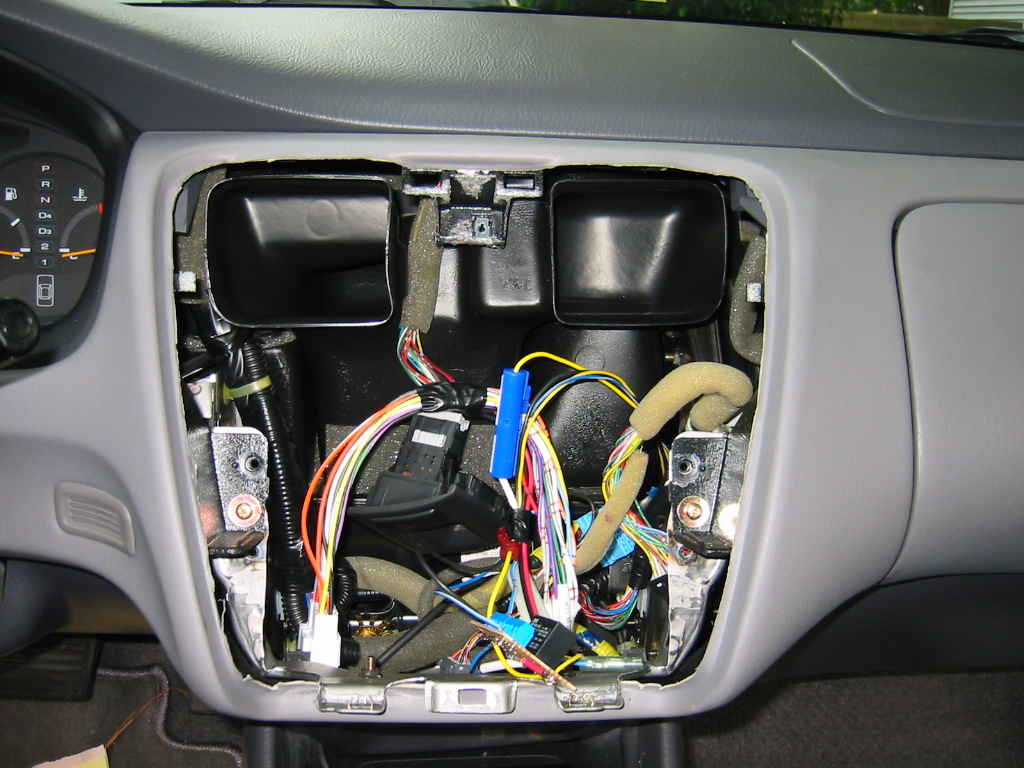
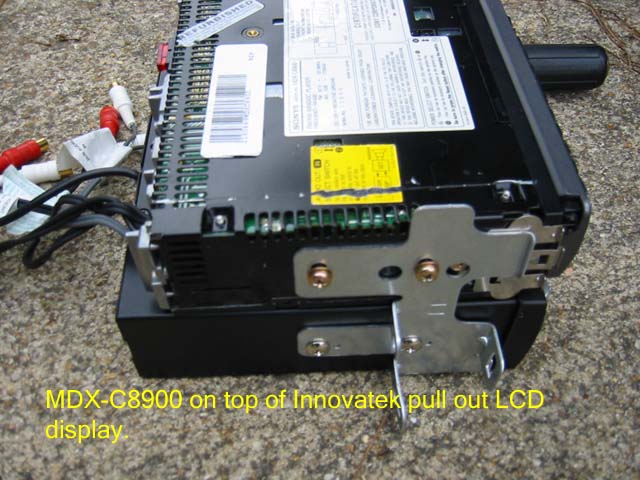
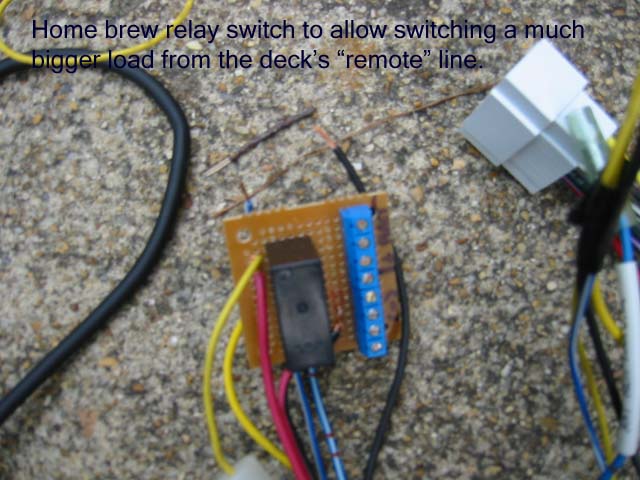
With the screens prepped it was time to figure out how to sit the pull out LCD under or over the Sony deck. The plastic adaptor that I used to mount the single deck in the dash would not fit both the LCD unit and the deck. I called up the local store, Discount Auto Sound. I expected a drooling idiot response, but instead I got a response that they had a kit intended for Alpine decks that would do the trick. No way! I hop on over, and purchase the box of assorted parts that supposidly will mount two single DIN units in a Honda Accord. Get it home, and it turns out to not include the brackets that hold the thing in the dash. Those have to come from the factory deck. Since I didn't have the factory deck in possesion I had to wait until I could get hold of it again (It was at parents house, and they were moving). I attempt to take the Alpine kit back, but Discount Auto Sound has a policy of store credit only. It figures, it was too good to be true. Last time I ever enter a Discount Auto Sound (they are shit, they carry shit, and their prices can _ALWAYS_ be beat). After finally getting hold of the factory brackets for the original deck, I was able to put the deck and LCD together for mounting. It wasn't terribly difficult, and while I was at it I created a small board that acts as a power switch so I could switch a much bigger load from the remote lead from the deck. This allows me to turn the LCDs all on when the deck is cut on, and will allow me to fire up the computer that will eventually be tied to the system as well.
Running the cables thru the seats was a chore. It involved taking the leather off, and working the wire thru the plastic part that the headrest sits in. For those that wish to attempt it... Running cables thru Honda Accord Seats Once you remove the seat back by pulling out at the bottom and sliding it down, you can see in the back of the seat. At the bottom, you can pull up and let loose the bottom of the seat cover. Once this is unhooked, it can be pulled thru to the front. There are these spring loaded tensioners that come thru the seat, if I remember there were 3 on one side of the seat and 4 on the other. After you undo these, you can feed them thru and the seat cover should come loose. This will allow you to get access around the top of the seat, near the plastic part where the cable needs to go under. Due to the metal support for the top of the headrest mount, I didn't want to try to drill down thru there to run the cable. I ended up cutting the cable and reterminating it after I ran it thru the seat. Also, another lesson learned the hard way... slide the seat all the way forward And you can get easy access under the seat to run cables for changers or anything you mount under there. |
|||||||||||||||||||||||||